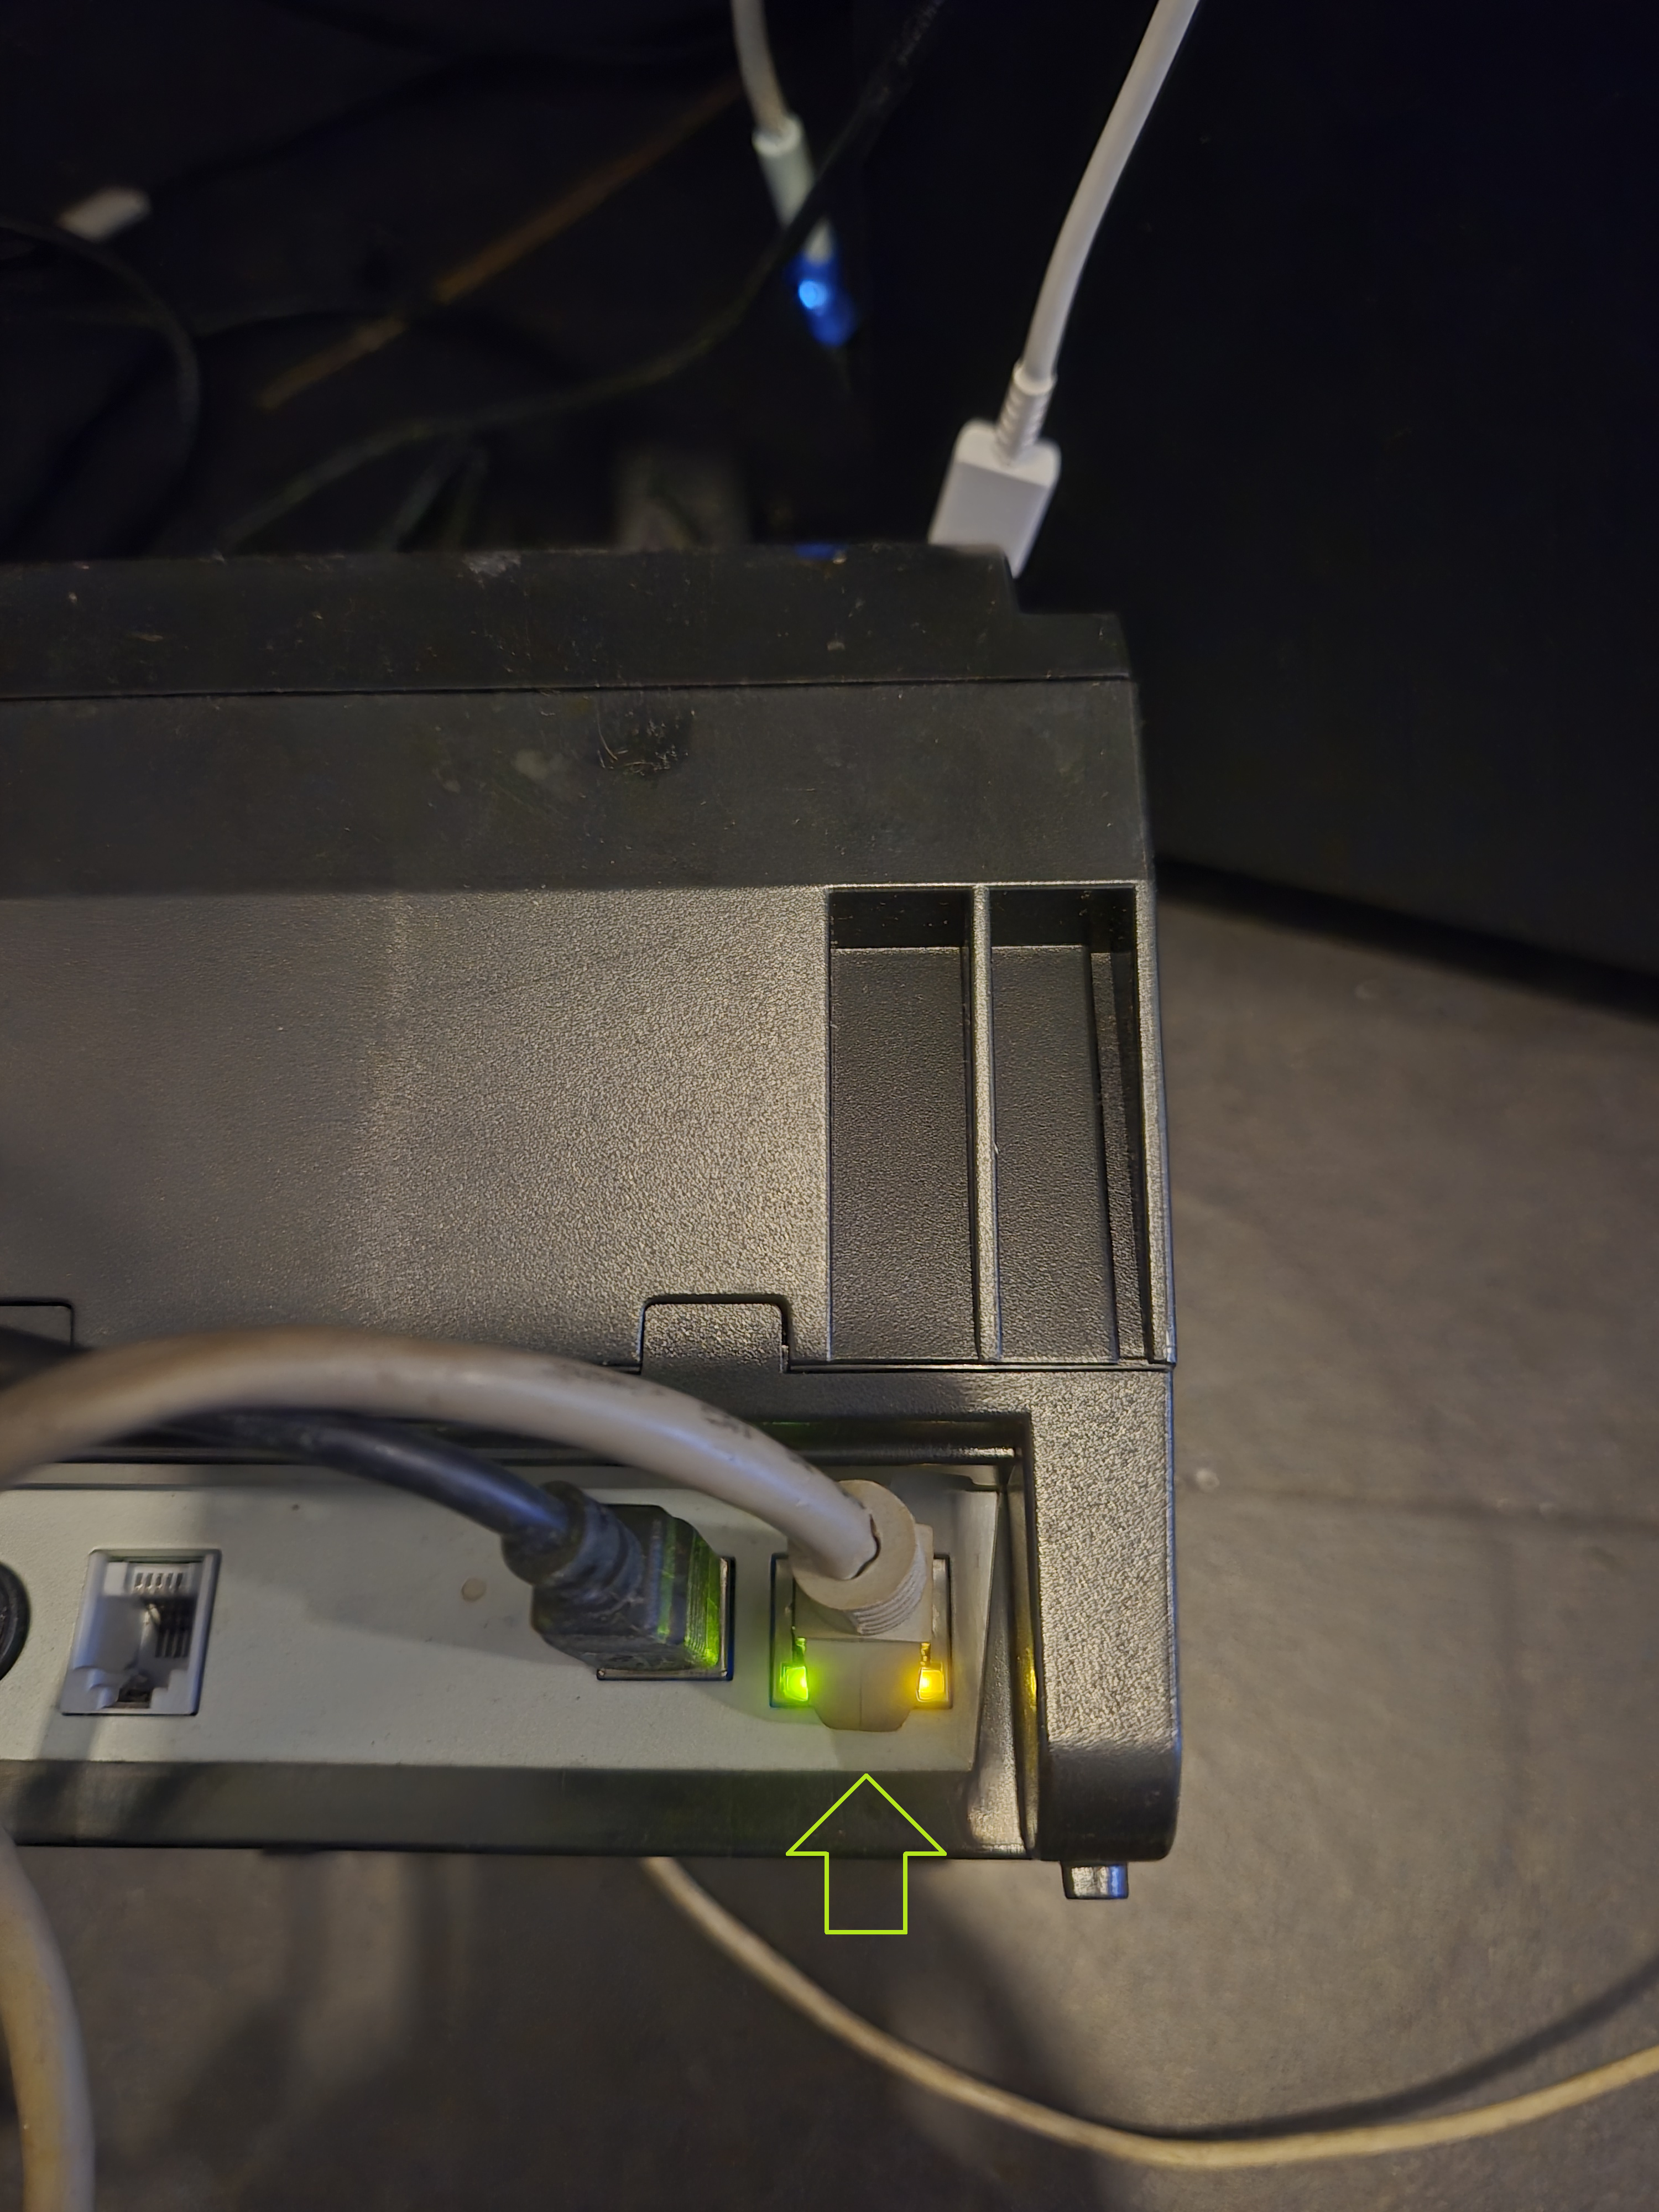
The most common causes are a loose LAN cable connection between the printer and POS, or router issues.
- Unplug and replug the LAN cable from the back of the printer.
- Check if the printer's power LED is on. Also check if two small lights on the LAN port are blinking — this indicates normal connection.
- Turn off the router, wait 5 seconds, and turn it back on.
- If the issue persists, take a photo and contact support.
 A properly working printer should have two indicator lights.
You can easily configure the printer IP using the setup tool. Please follow the steps below.
- Click the link below to download the printer IP configuration tool. [Download Now] ※ Antivirus software may occasionally block the installation. If this happens, please temporarily disable it and proceed. This program is safe.
- Run the downloaded file and complete the installation.
- After installation, open the program and connect the printer to your laptop. The cable is included in the printer box.
- After connecting the printer to your laptop, launch the program. Make sure the settings match the image. Enter your desired IP in the "New IP" field, then click the "Set New IP" button. A "beep" sound means the IP has been successfully updated.


 Example of the printer IP setup tool interface
The counter POS and order POS must be on the same Wi-Fi. If not connected, please check the following:
- Make sure the order POS is not connected to a different Wi-Fi.
- Verify that the entered counter POS IP address is correct.
- Restart the router if there might be an issue.

This image shows step 2. Accessing the network settings on the counter POS.

This image shows step 2. Checking the IP address on the counter POS.

This image shows step 2. Opening the IP input screen on the order POS.

This image shows step 2. Entering and saving the correct IP on the order POS.
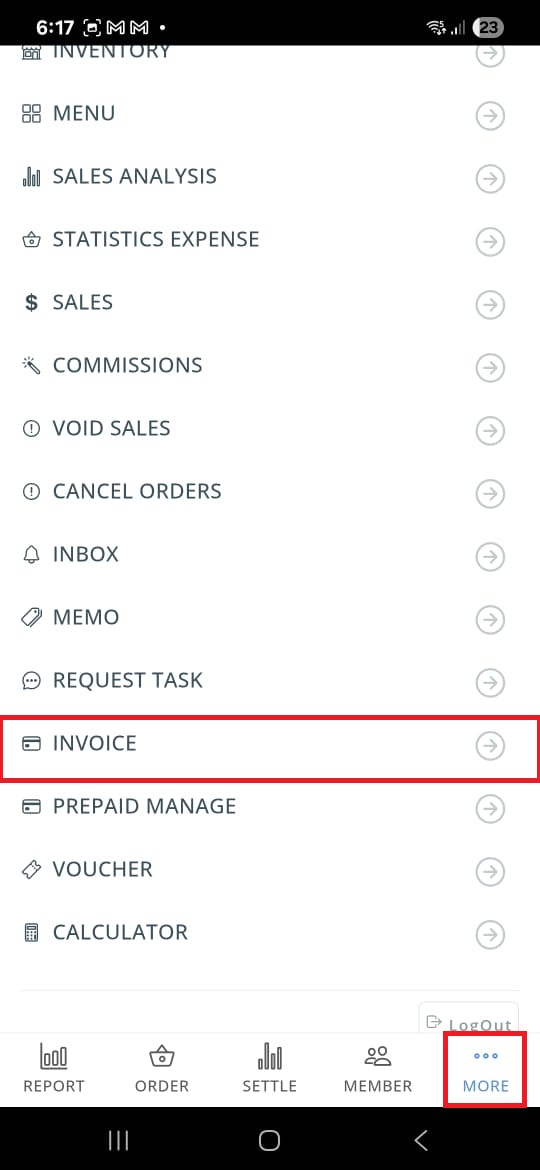
Billing is handled via the KAdmin app. Go to [More → Invoice] to check unpaid and paid bills. After making payment, upload the screenshot to confirm billing automatically.
- Open the KAdmin app and go to [More] → [Invoice].
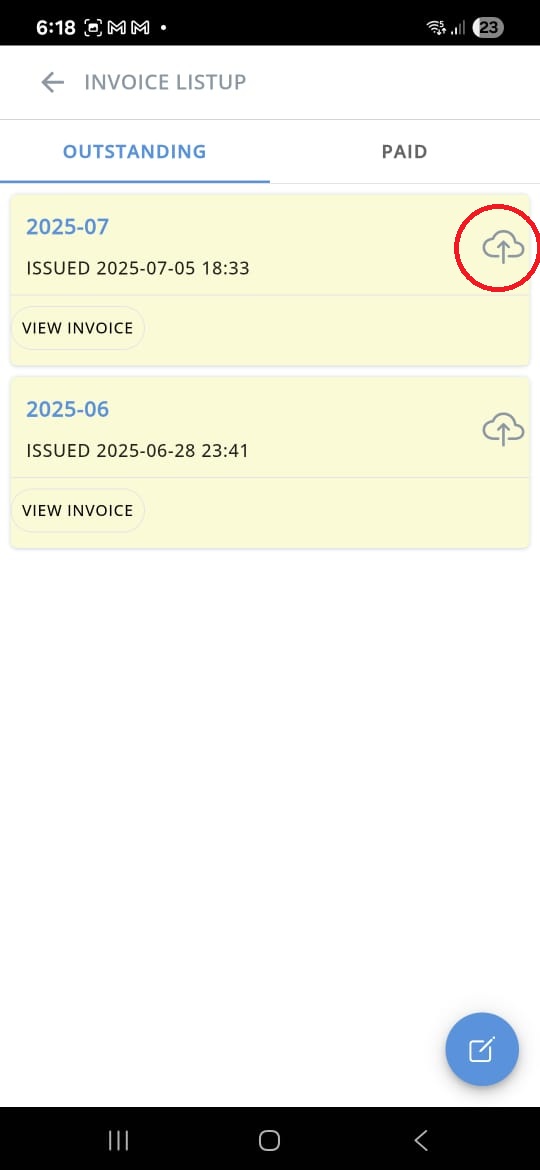
- Check your unpaid and paid invoice list.
- Make the payment based on the invoice amount.
- Upload a screenshot of the payment — the system will confirm it automatically.

This is the invoice list in the KAdmin app.

Upload your payment screenshot here.

